

1. Describe the schedule
Open your project and start a new chat with the correct Revit document connected. Explain which doors to include and what the schedule should show.Create an automation for a door schedule on [level] in [phase], using the host model only. Include door number, family and type, room names, width, height and fire rating where those parameters are available. Use millimetres, show one row per door and sort by door number. Propose the structure first and flag missing information rather than inventing values.Start with one level so you can check the result before extending it to the whole project.
2. Choose the information and structure
Think about who will use the schedule and what they need to find. A practical door schedule can include:
Ask Ideatura to use your existing parameters and identify any missing fields before adding new ones.
For this example, keep one row per door so individual requirements remain visible. A separate summary grouped by type can provide quantities. Revit supports both itemised and grouped schedules. Autodesk’s examples.
3. Start from an existing CSV
You can attach an office-standard CSV and ask Ideatura to recreate its structure as a native Revit schedule.Use this CSV as the reference for the door schedule’s headings and column order. Match its columns to the parameters in my model. Show me the mapping and identify missing or ambiguous fields before creating the schedule. Keep existing model values unchanged.If you also want to transfer values from the CSV, specify how rows should match doors—for example, by a unique door number. Ask to preview changes and flag duplicate or unmatched numbers before updating anything.
4. Make the automation reusable
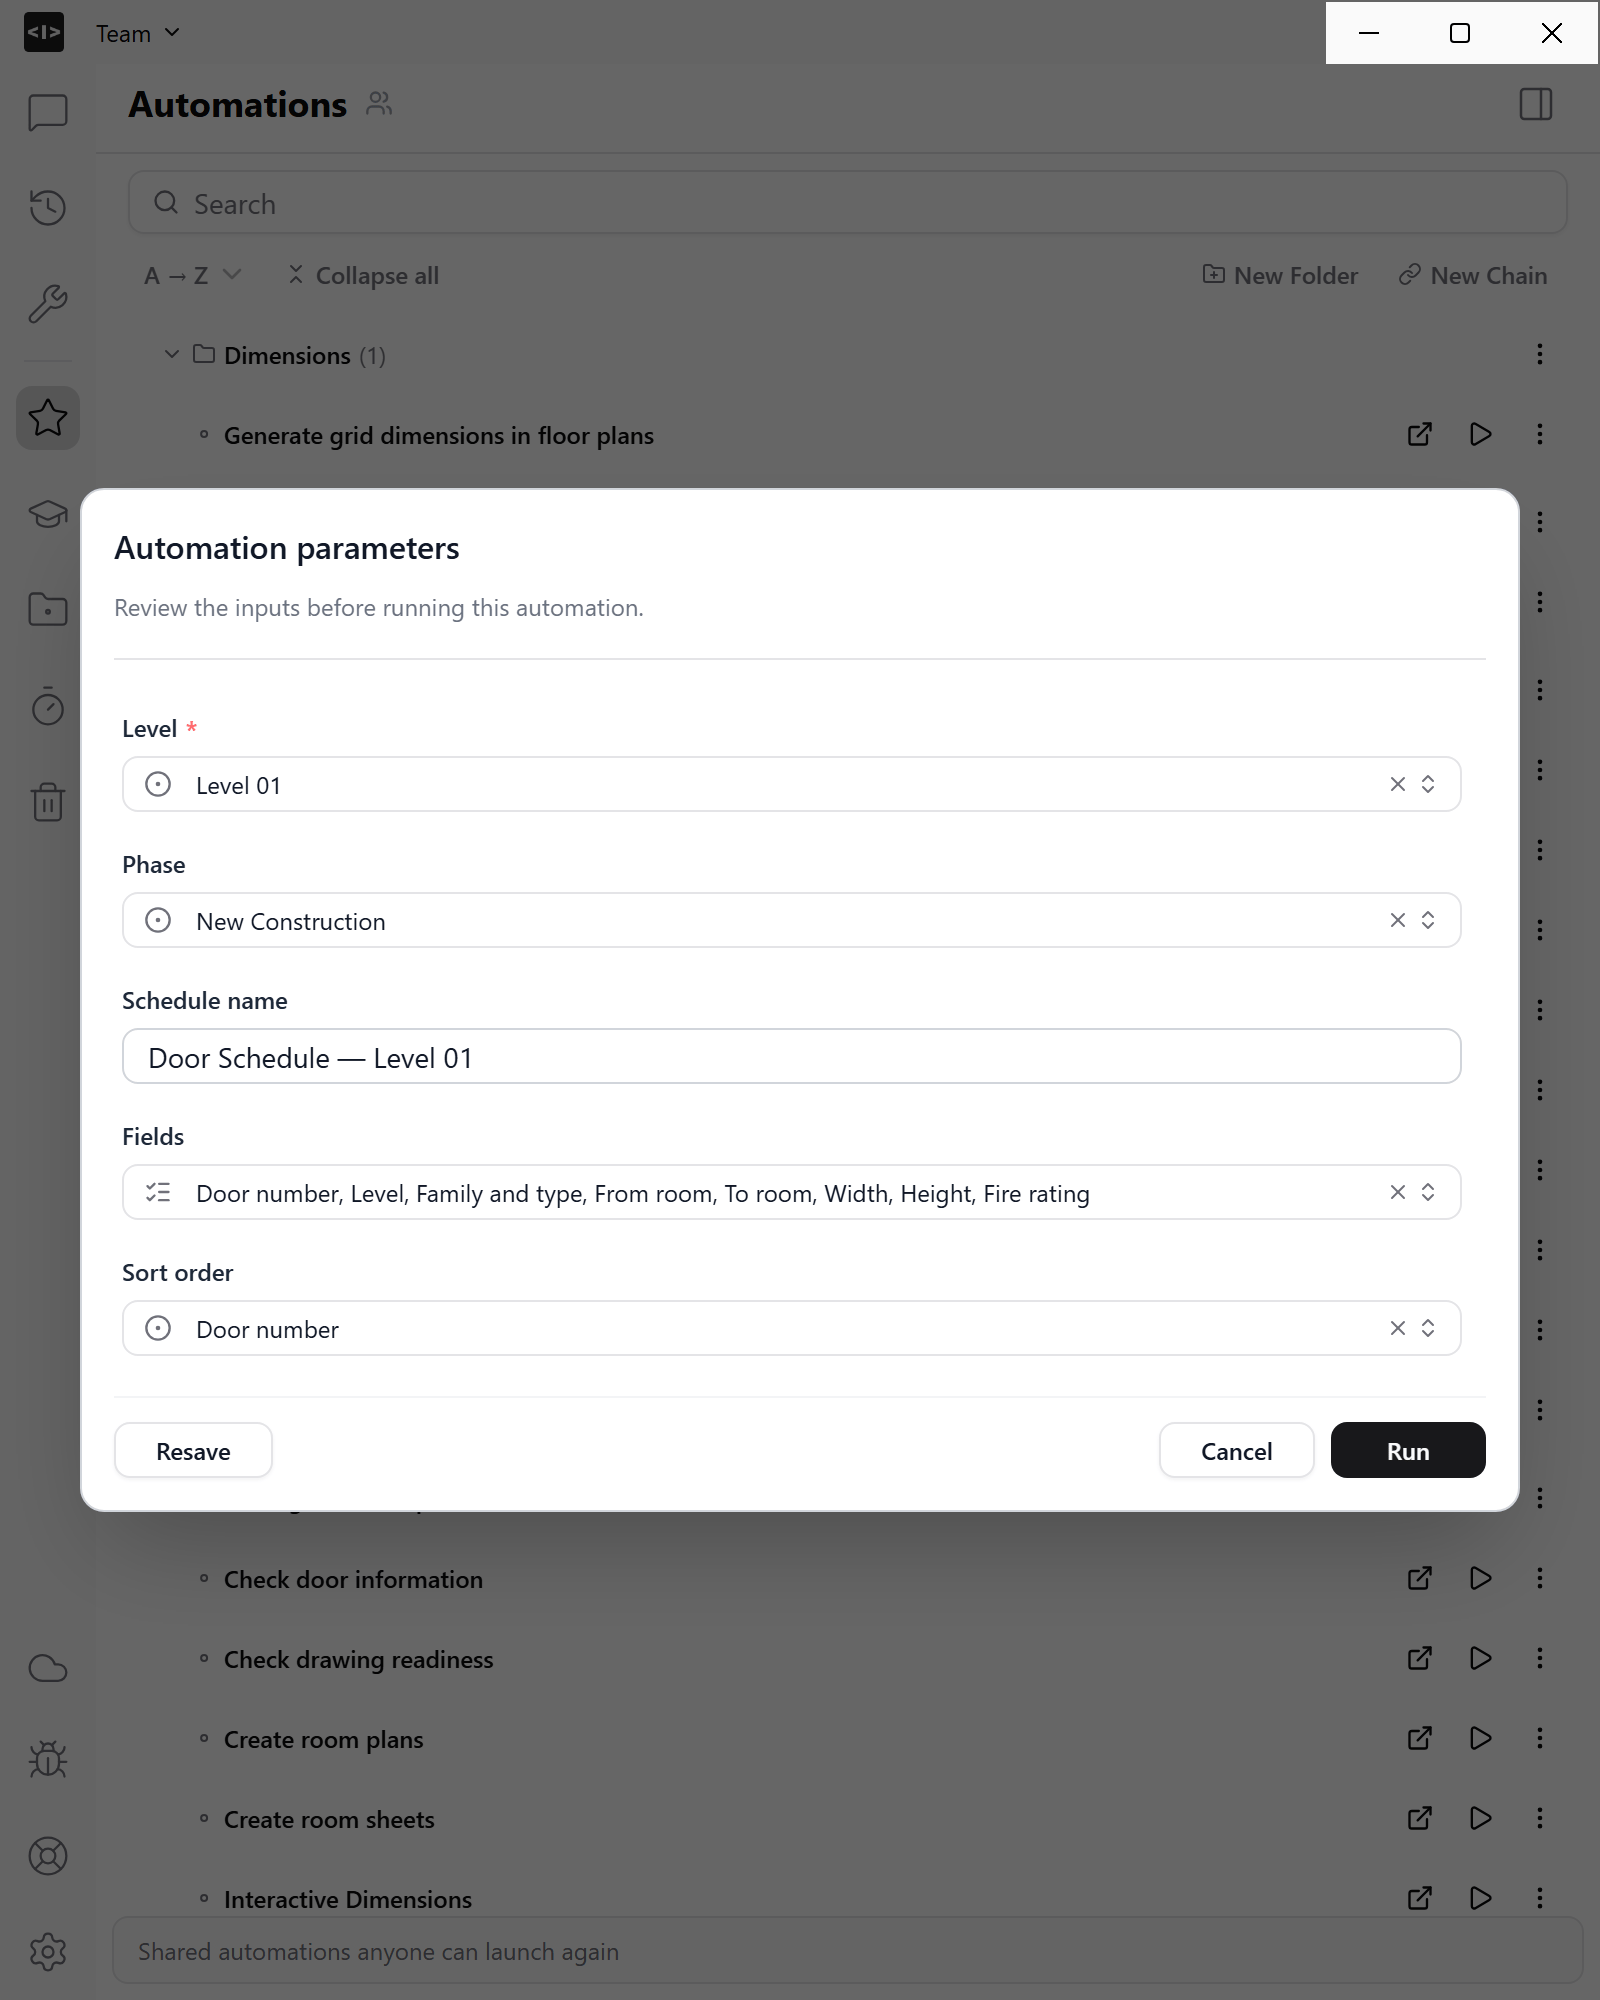
Ask for controls you can adjust on another project:Add inputs for the level, phase, schedule name, fields and sort order. If the named schedule already exists, update it rather than creating another copy.The illustrative form below selects level, phase, schedule name, fields and sorting. Check these choices, then select Run. This example includes host-model doors; ask for linked models or grouped totals if your project needs them.
5. Check the schedule against the model
Run the automation and open the resulting schedule in Revit. The Garden Office schedule below contains two doors, D-101 and D-102, with family, type, level, width, height, mark, from-room and to-room fields. Their to-room values are Studio and Meeting; the from-room fields are blank because the doors lead from outside. Compare the rows with the corresponding doors in your own project. Check door numbers, room associations, dimensions and the number of included doors. Confirm what the width parameter represents in your families: leaf width, nominal size or opening width. Here, the door width parameters are 798 mm and 1098 mm, and both heights are 1998 mm. These width values differ from the 900 mm and 1200 mm wall openings shown in the plan. Check fire ratings and hardware against the project information. Creating the schedule does not supply missing specification data.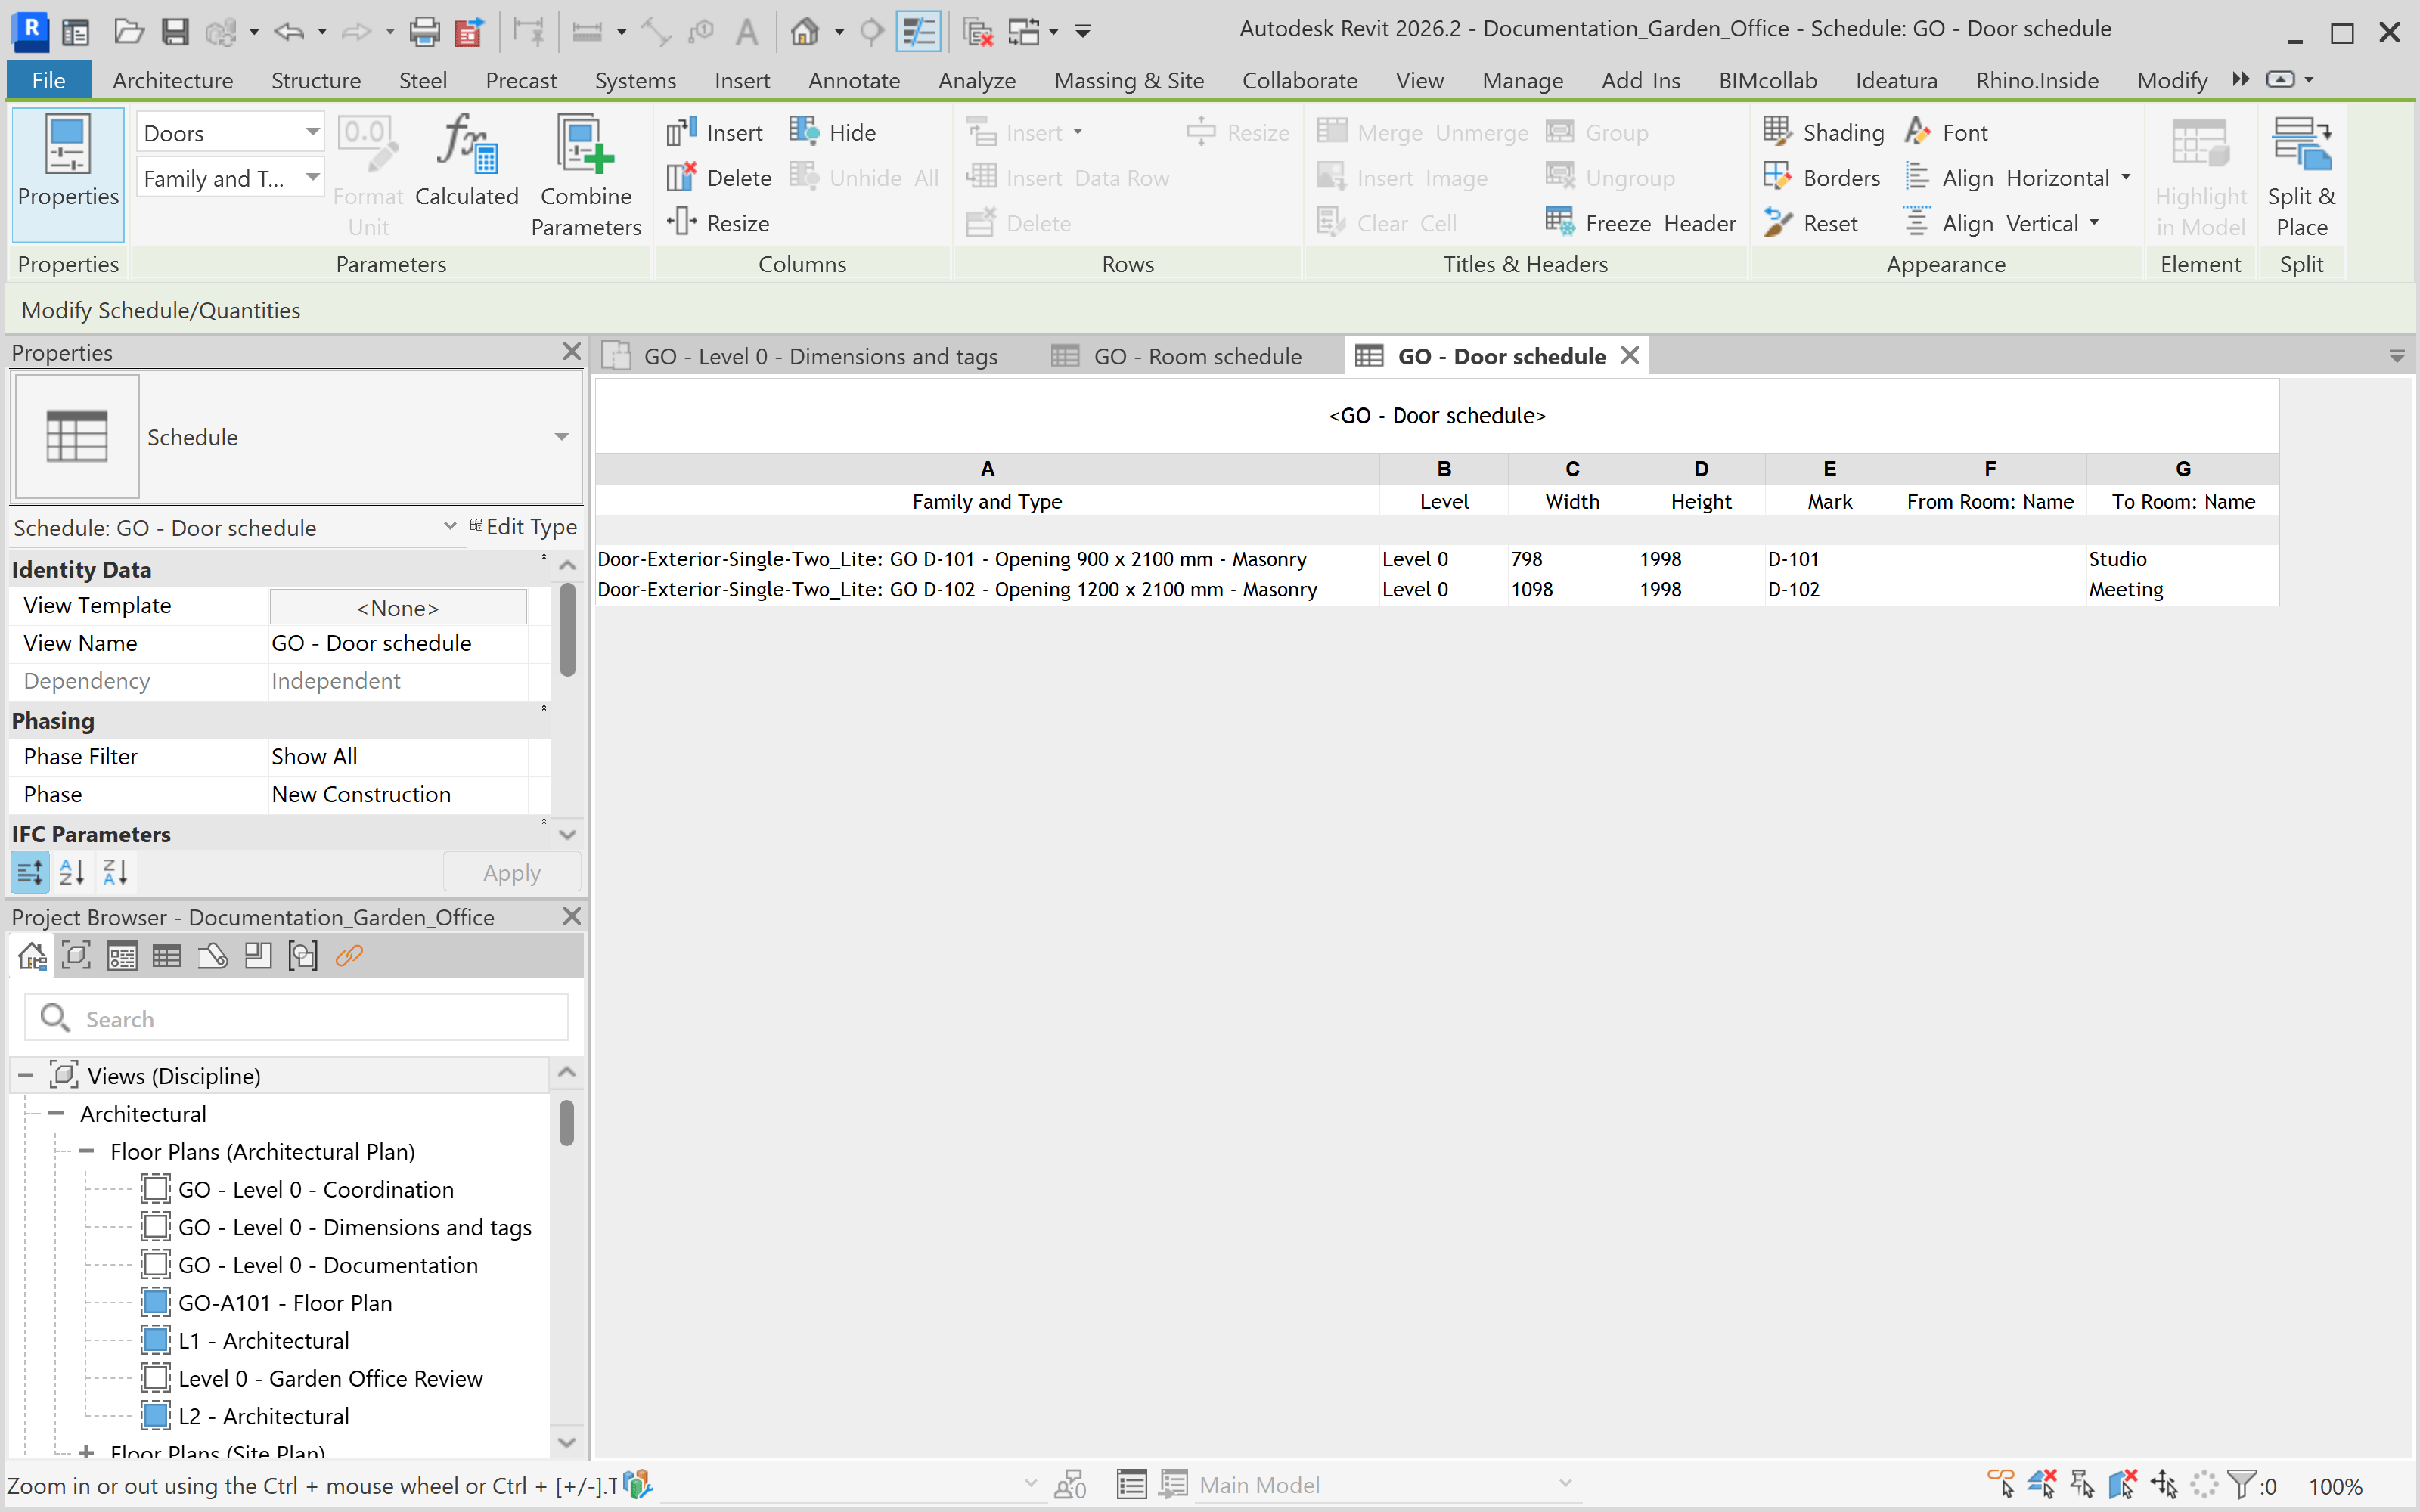
6. Refine and save
Ask for a focused adjustment:Sort the doors by family and type, then by door number. Keep one row per door and retain the existing columns.Inspect the revised schedule, then save the automation with a clear name. Save the Revit project separately. When reusing it, check that the new project has the parameters and scope the automation expects.