

1. Start with your own plan
Open your project in Revit and connect it to a new Ideatura chat. Choose one floor plan with a representative mix of rooms, partitions and openings. Decide which walls to include, which faces to measure and which elements to exclude. For example, you might dimension permanent partitions while excluding lightweight WC cubicles.2. Describe the automation you want
Start with a request such as:Create an Internal Wall Dimensions automation for my Revit project. Let me select the floor plans, wall source, wall function, dimensioned face and dimension style. Include a wall-type exclusion list and editable offset and alignment settings in millimetres. Start with host-model interior walls on one plan. Preserve existing annotations and check for duplicate dimensions. Show me the proposed controls before running.Explain the intended measurements too. Do you need partition lengths, clear room widths, opening positions, or a combination? For a clear room width, specify that the measurement should run between the relevant finished faces. Read the generated description, then open Run with parameters to review the controls.
3. Build the controls
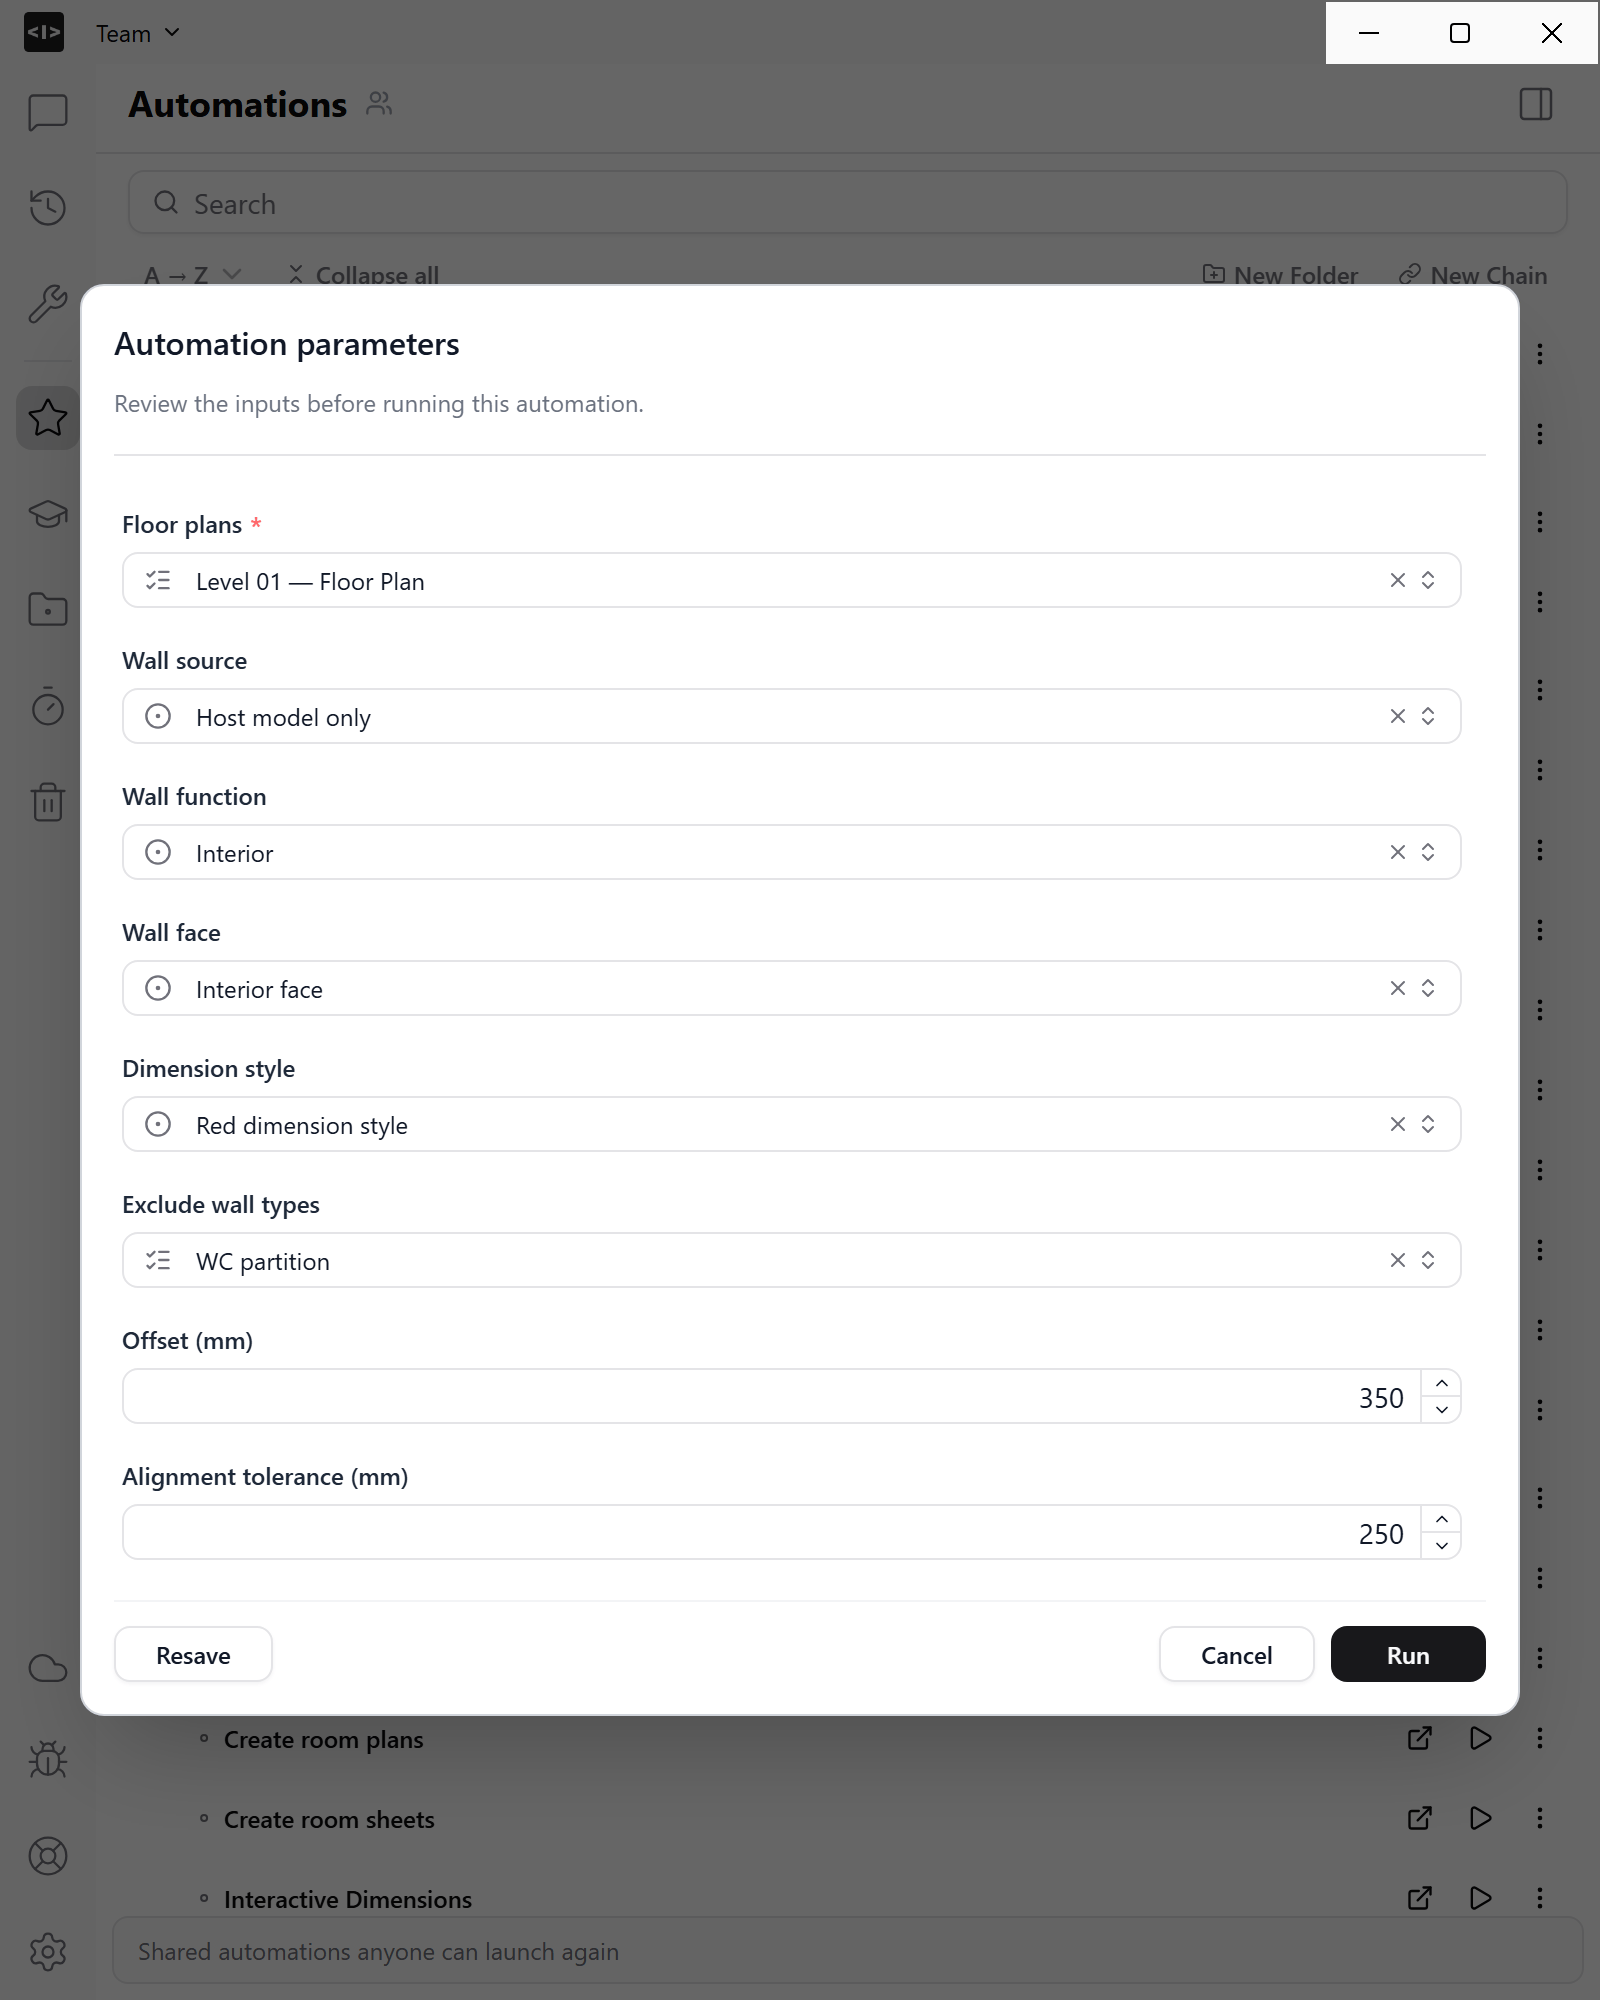
Ask Ideatura to expose the settings shown in this example:
The tested example uses Host model only, Interior function, Interior face and the project’s red dimension style. It excludes the WC partition type and uses a 350 mm offset with 250 mm alignment tolerance. Review these values against your drawing.
Wall function and wall face are separate choices. A wall’s Interior face does not necessarily face the room you intend to measure.
Below, check the plan, wall source and function, wall face, style and exclusions. Set the offset and alignment tolerance, then select Run.
4. Account for different conditions
Build a small first version, then add cases your projects need:- Rotated partitions: describe how dimension strings should follow their orientation.
- Doors and windows: specify whether to include opening widths, positions or both.
- Curtain walls: identify whether curtain grids or other references are required.
- Linked walls: name the relevant link and check its references.
- Small partitions: decide which types to exclude to avoid unnecessary strings.
5. Run, inspect and refine
Run on one plan. Check the referenced faces, values, omitted elements, duplicates and readability in Revit. The Garden Office plan below illustrates a dimension check: two rooms have clear widths of 5925 mm and heights of 4000 mm, door openings measure 900 mm and 1200 mm, and the outer dimensions are 12400 × 4400 mm. Compare your dimensions with the intended wall faces and opening edges. Check short segments and crowded labels closely. If a wall end lacks a usable reference, inspect the omitted segment before extending the automation.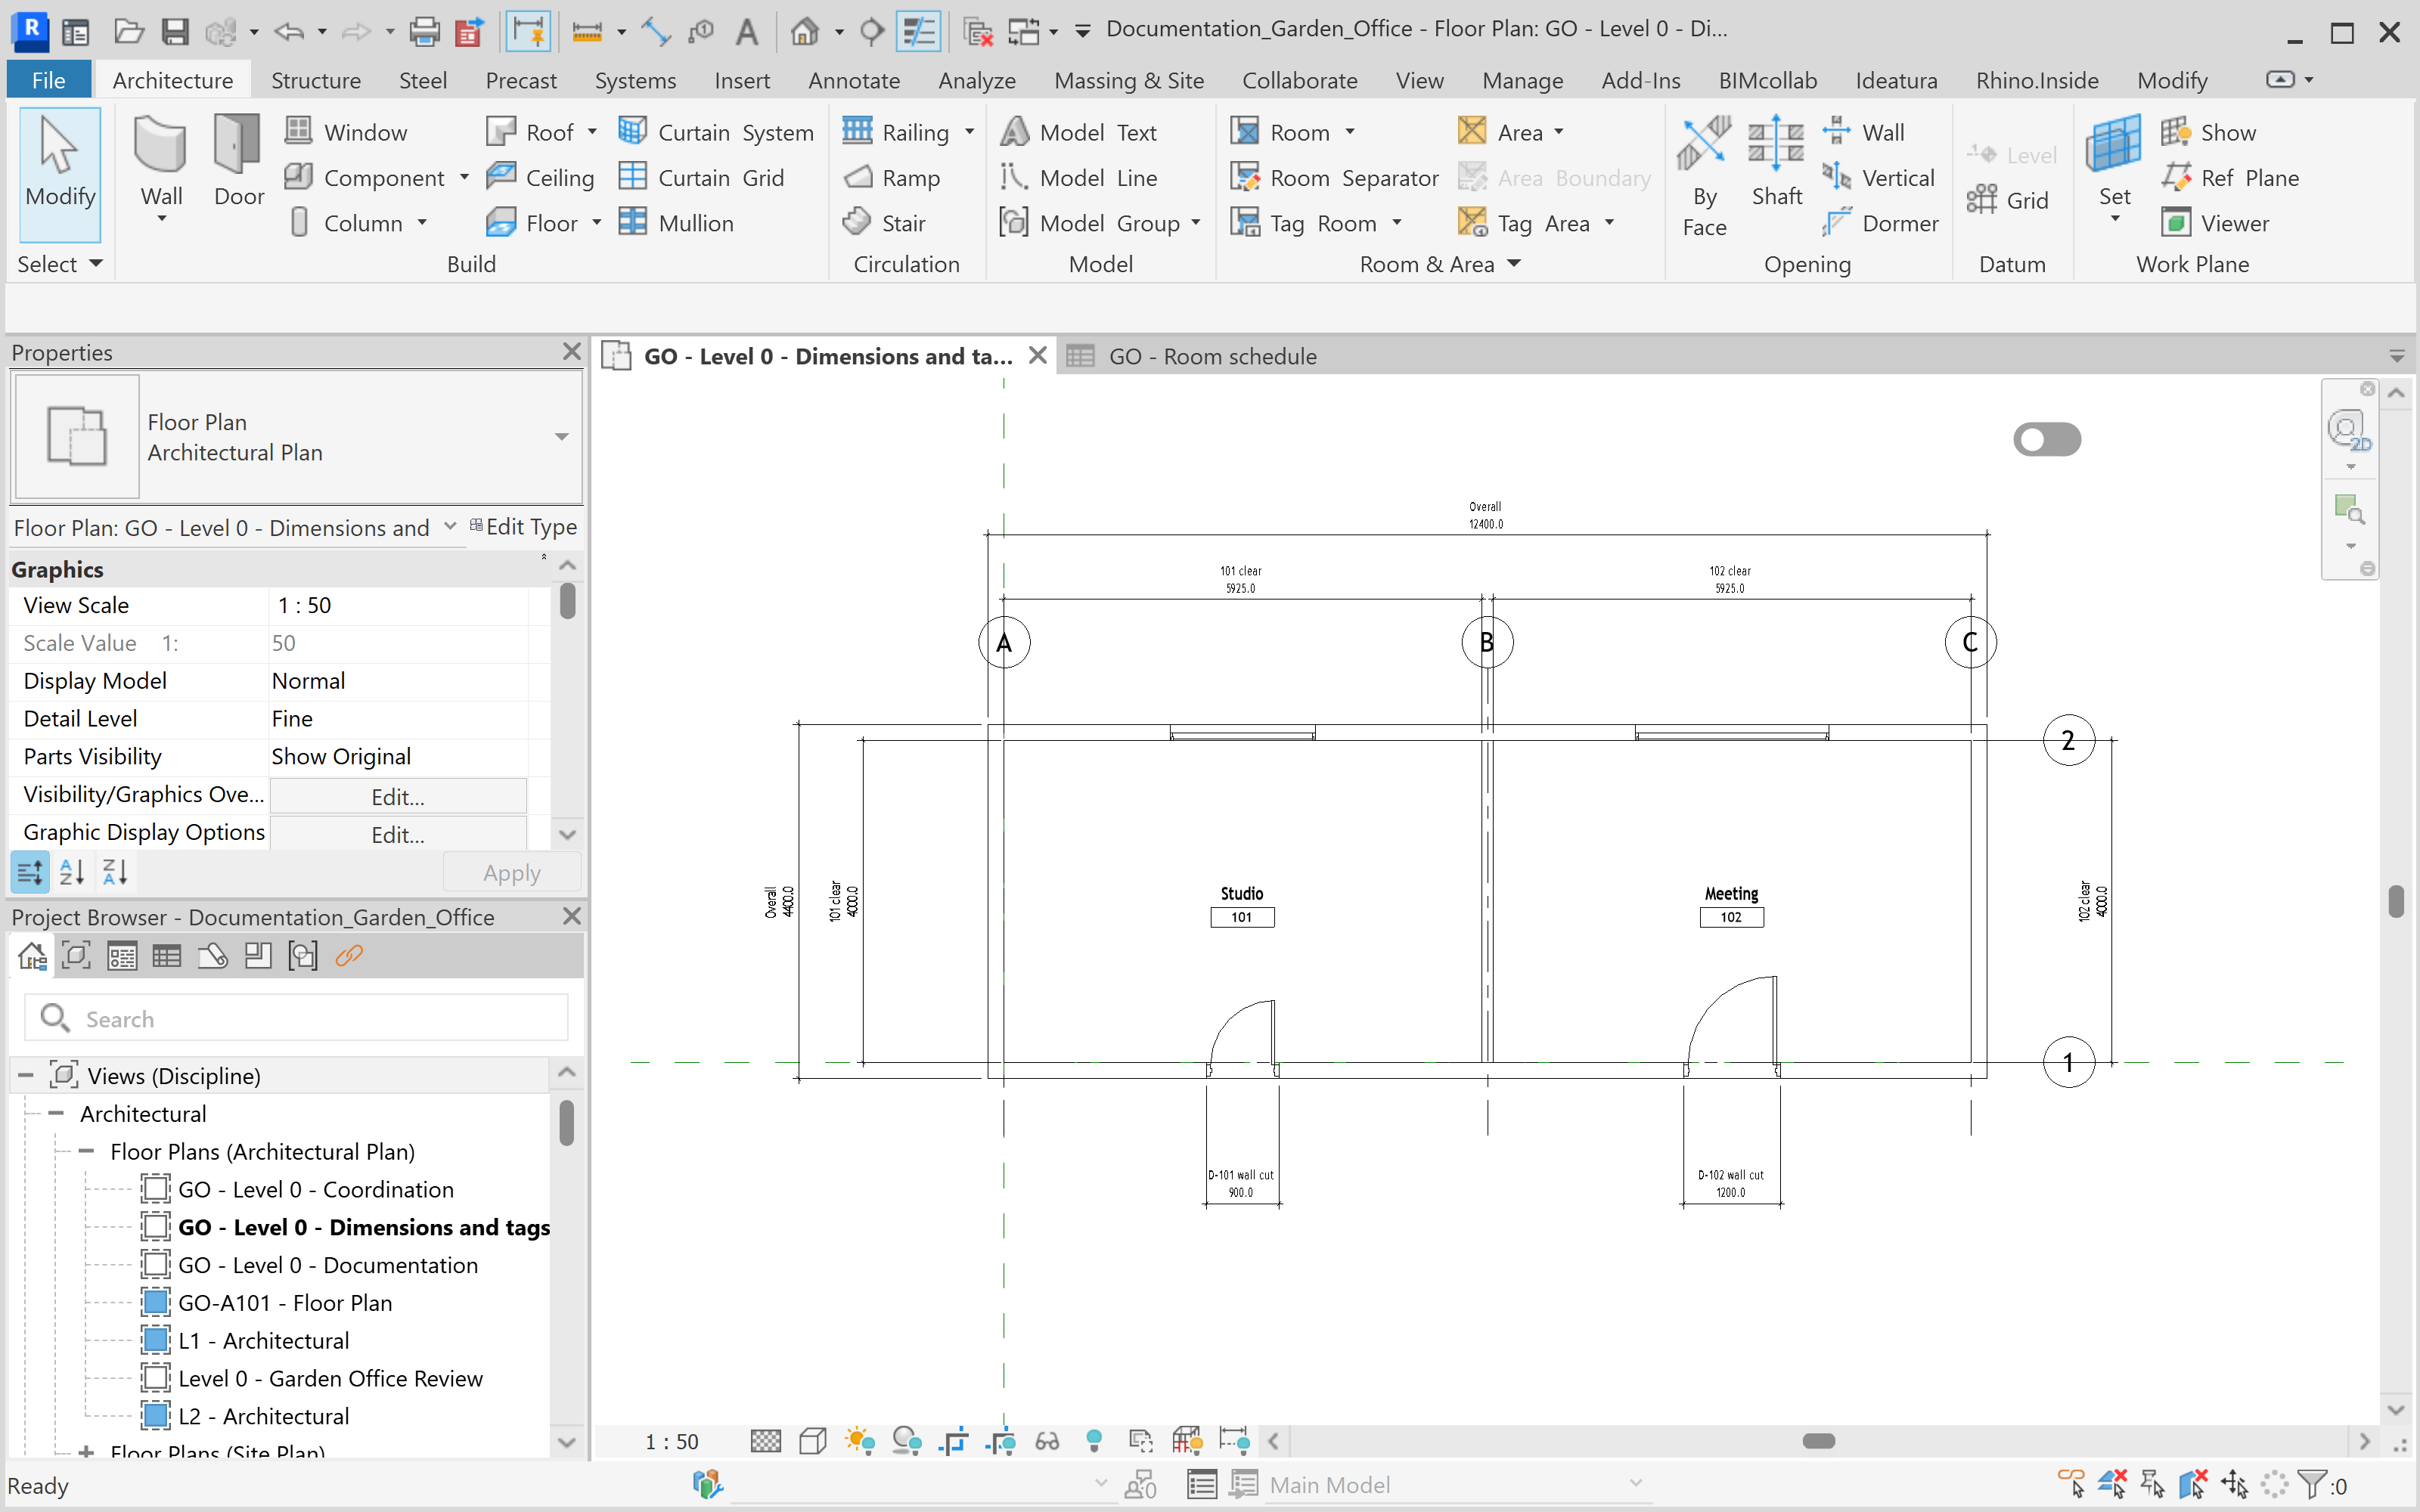
Adjust only the dimension labels beside the meeting room door so they remain readable. Keep their references and all other dimensions unchanged.Once the result matches your requirements, save the automation with a clear name and description of its tested scope. Save the Revit project separately.