Use Ideatura with Revit to dimension drawings, place tags, prepare views and sheets, or work on models and families. Start with one task you can inspect in your project. Watch the drawing-set example to see a workflow in action.

1. Connect the document

Open your project or family in Revit. Use the controls in the screenshot:
  • Connected Apps: open the application and document selector.
  • Revit document: select the exact filename. If several files are open in the same Revit instance, check which one is selected and that your active view belongs to that document.
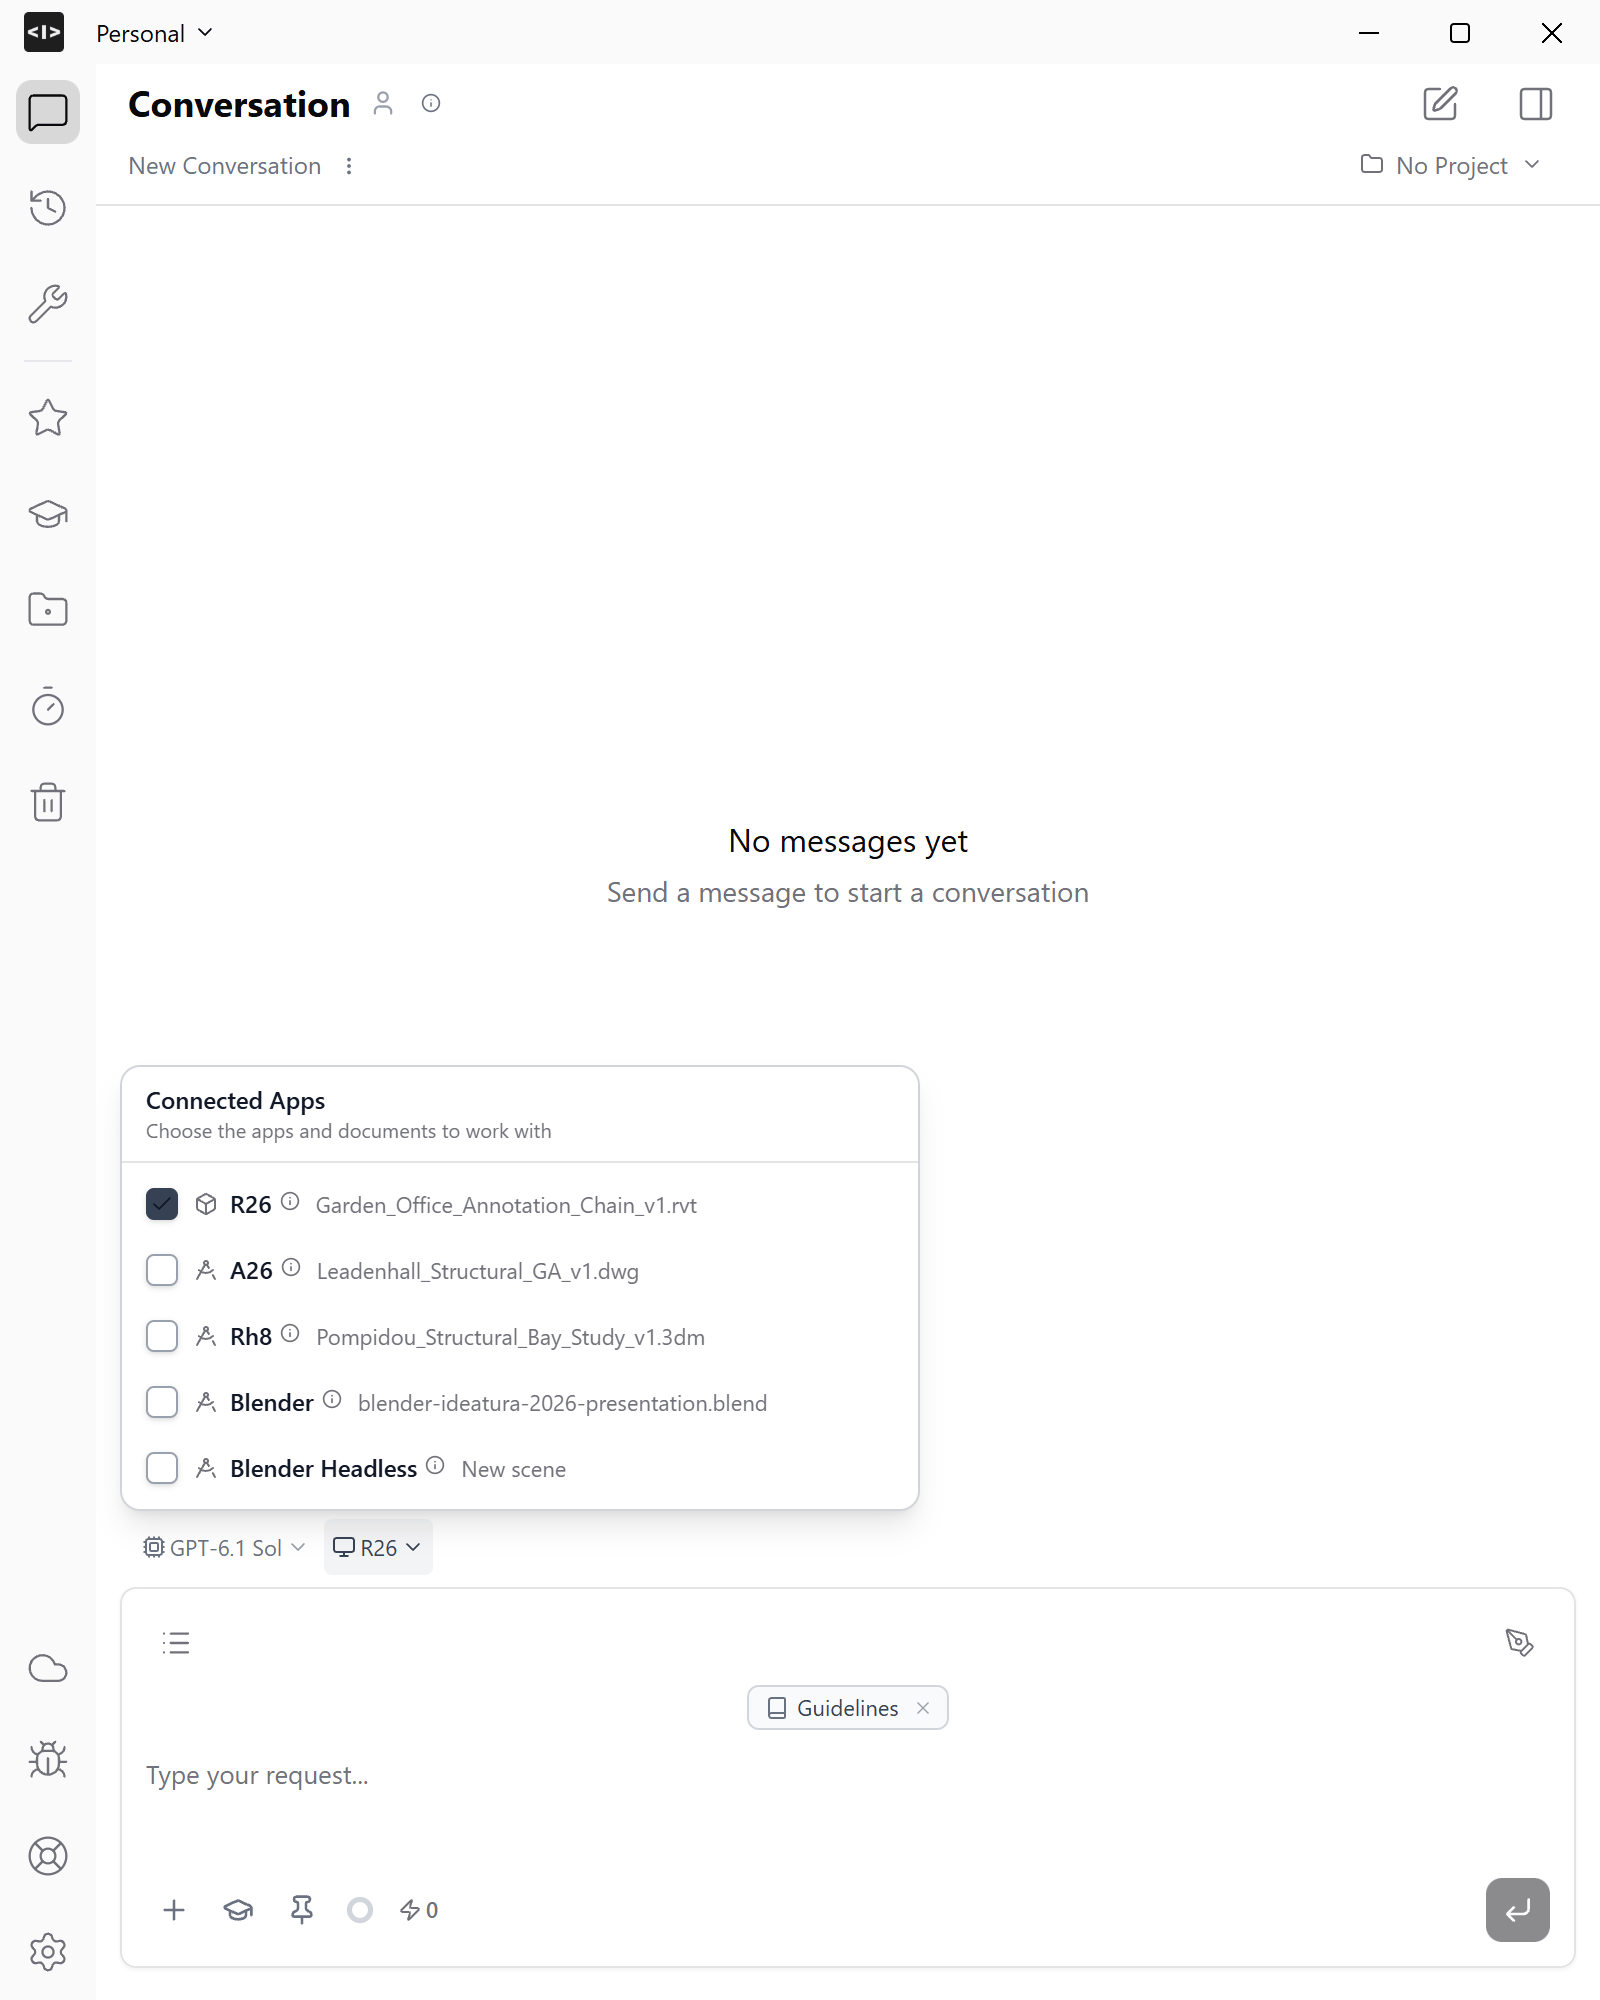
Full Studio window with Garden Office selected in Connected Apps and GPT-6.1 Sol selected. See Connect your model for the full connection check.

2. Annotate a floor plan

Open one floor plan and describe the annotations you want:
Add overall dimensions, internal room dimensions and door-opening dimensions to this plan. Tag the rooms with their names and numbers. Keep existing annotations and place the new ones clear of the drawing.
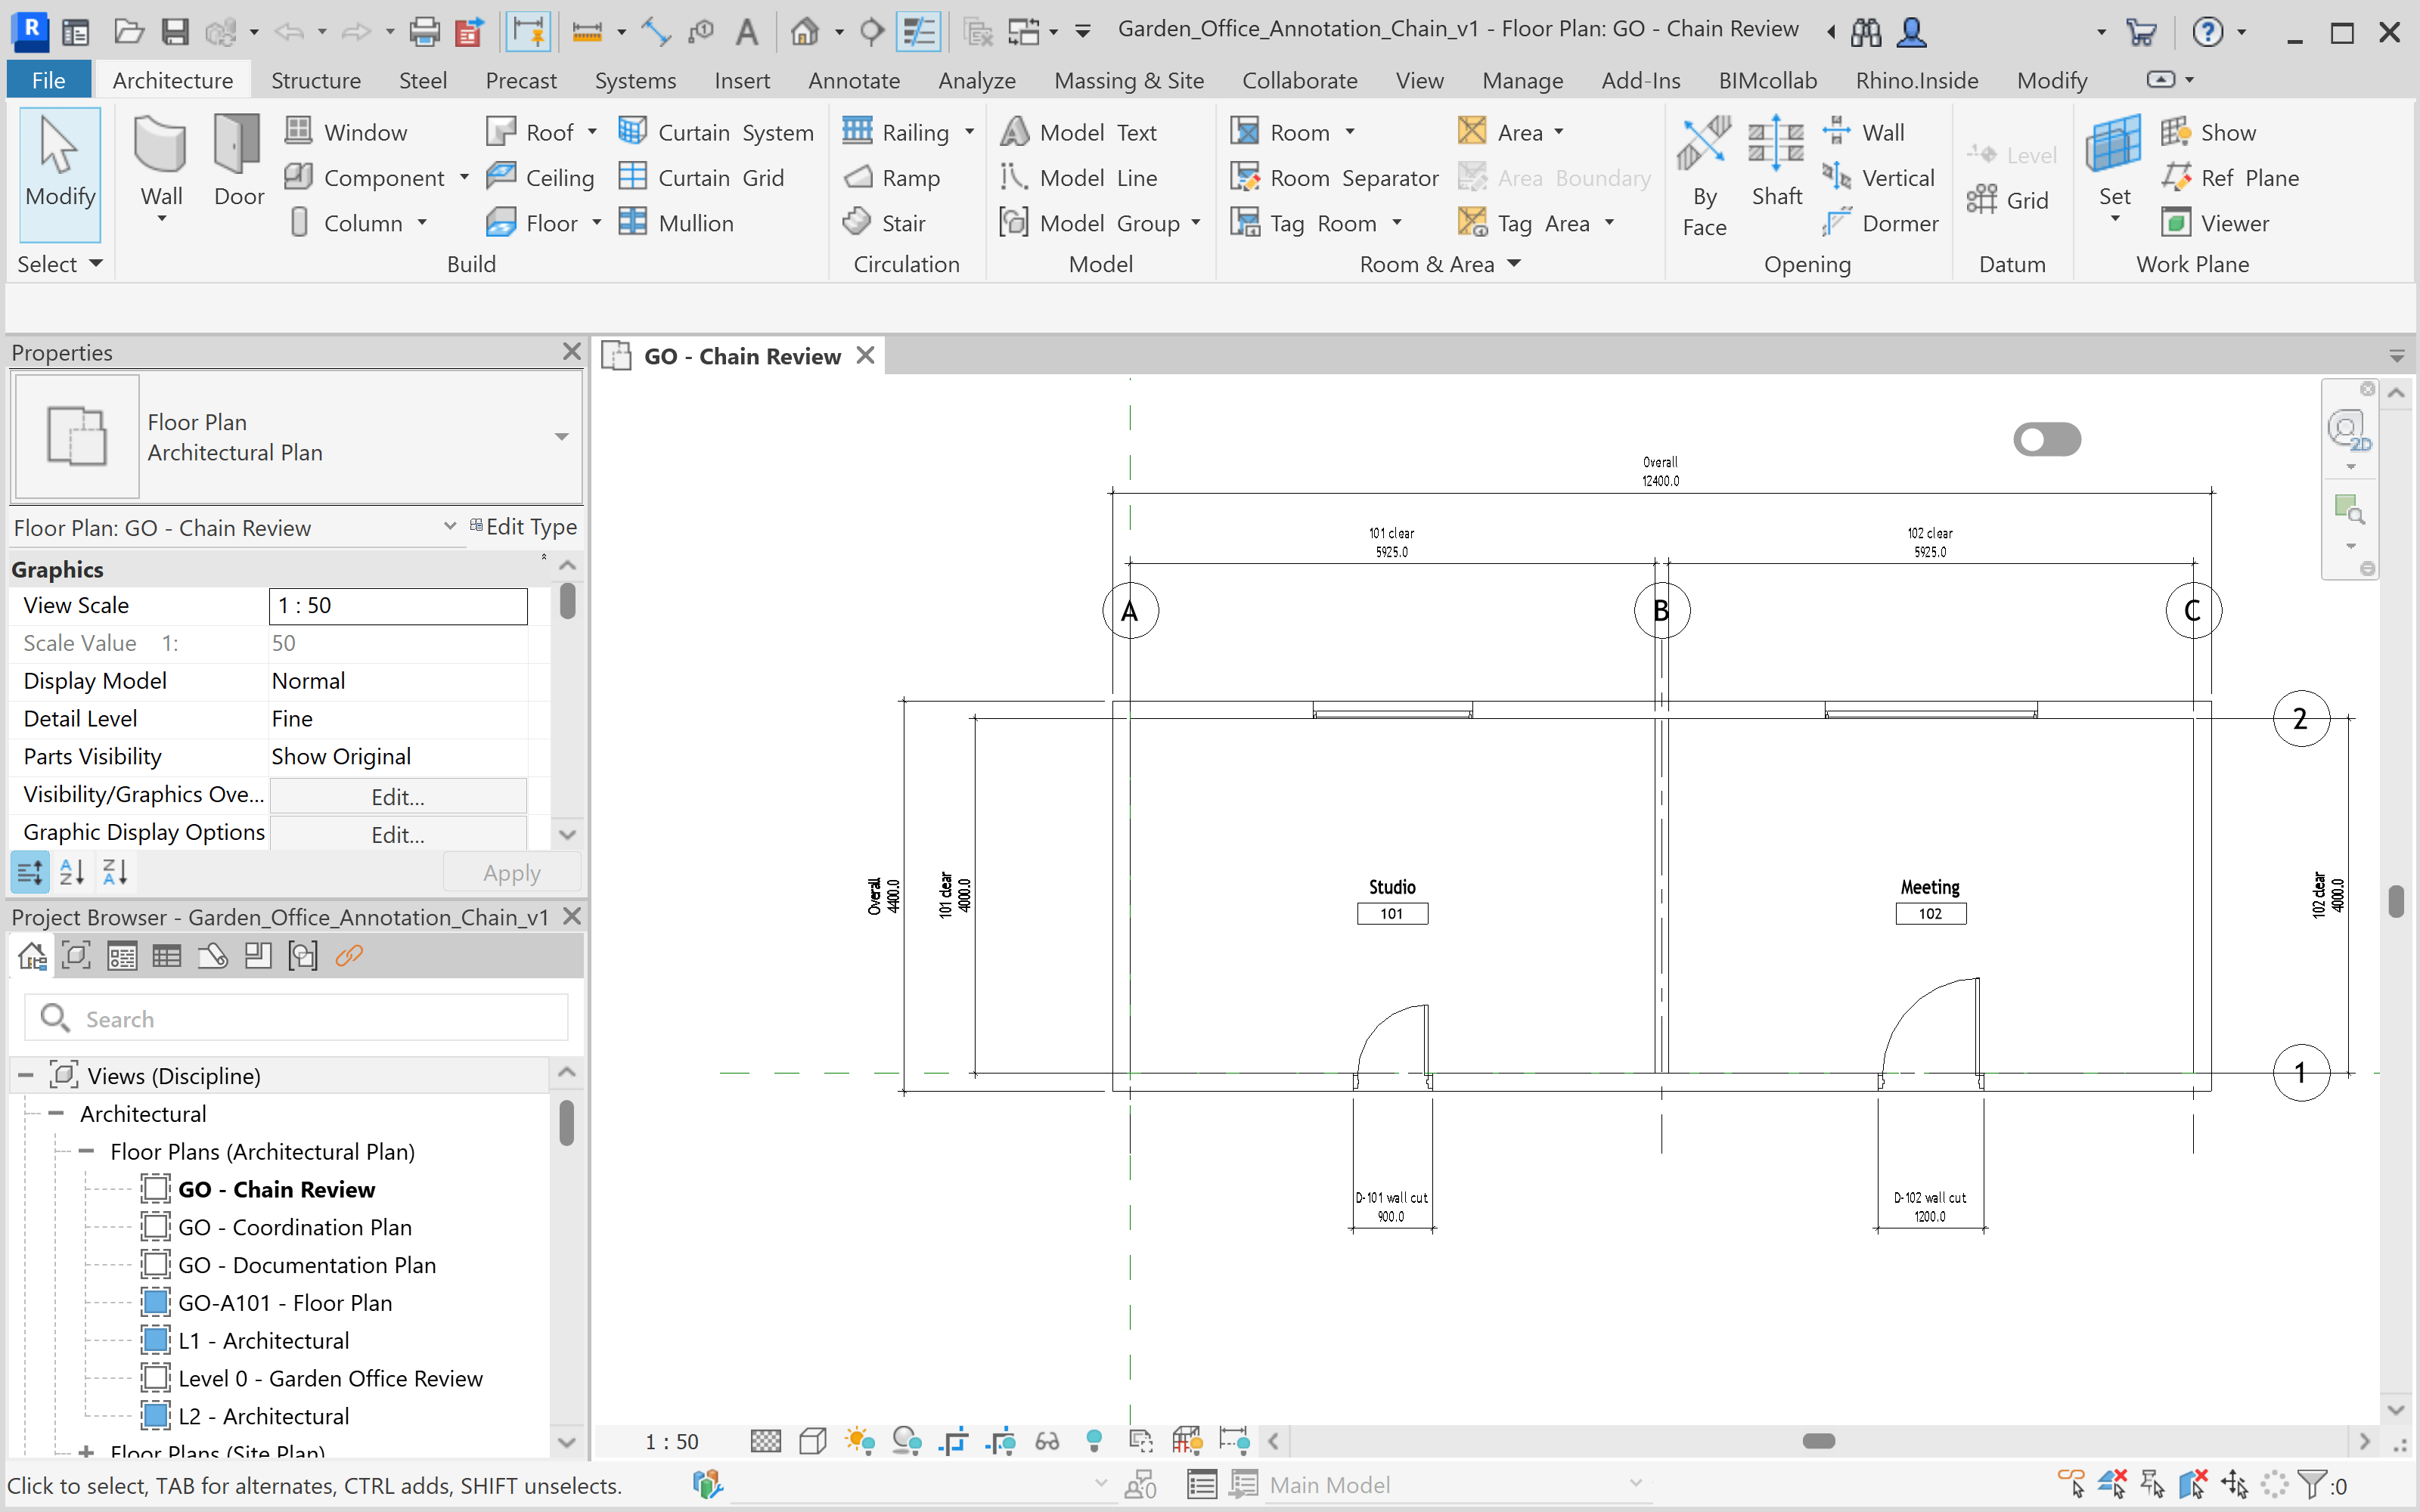
Enter the request in Studio. Confirm the connected Revit document before sending it. This Garden Office sample contains eight dimensions and two room tags in the GO - Chain Review plan. In your result, check the dimension references, text placement and room names and numbers. Full Revit window showing the Garden Office review plan with dimensions and room tags. To repeat annotation tasks on other plans, follow Wall dimensions or Place tags.
3. Prepare drawings and sheets

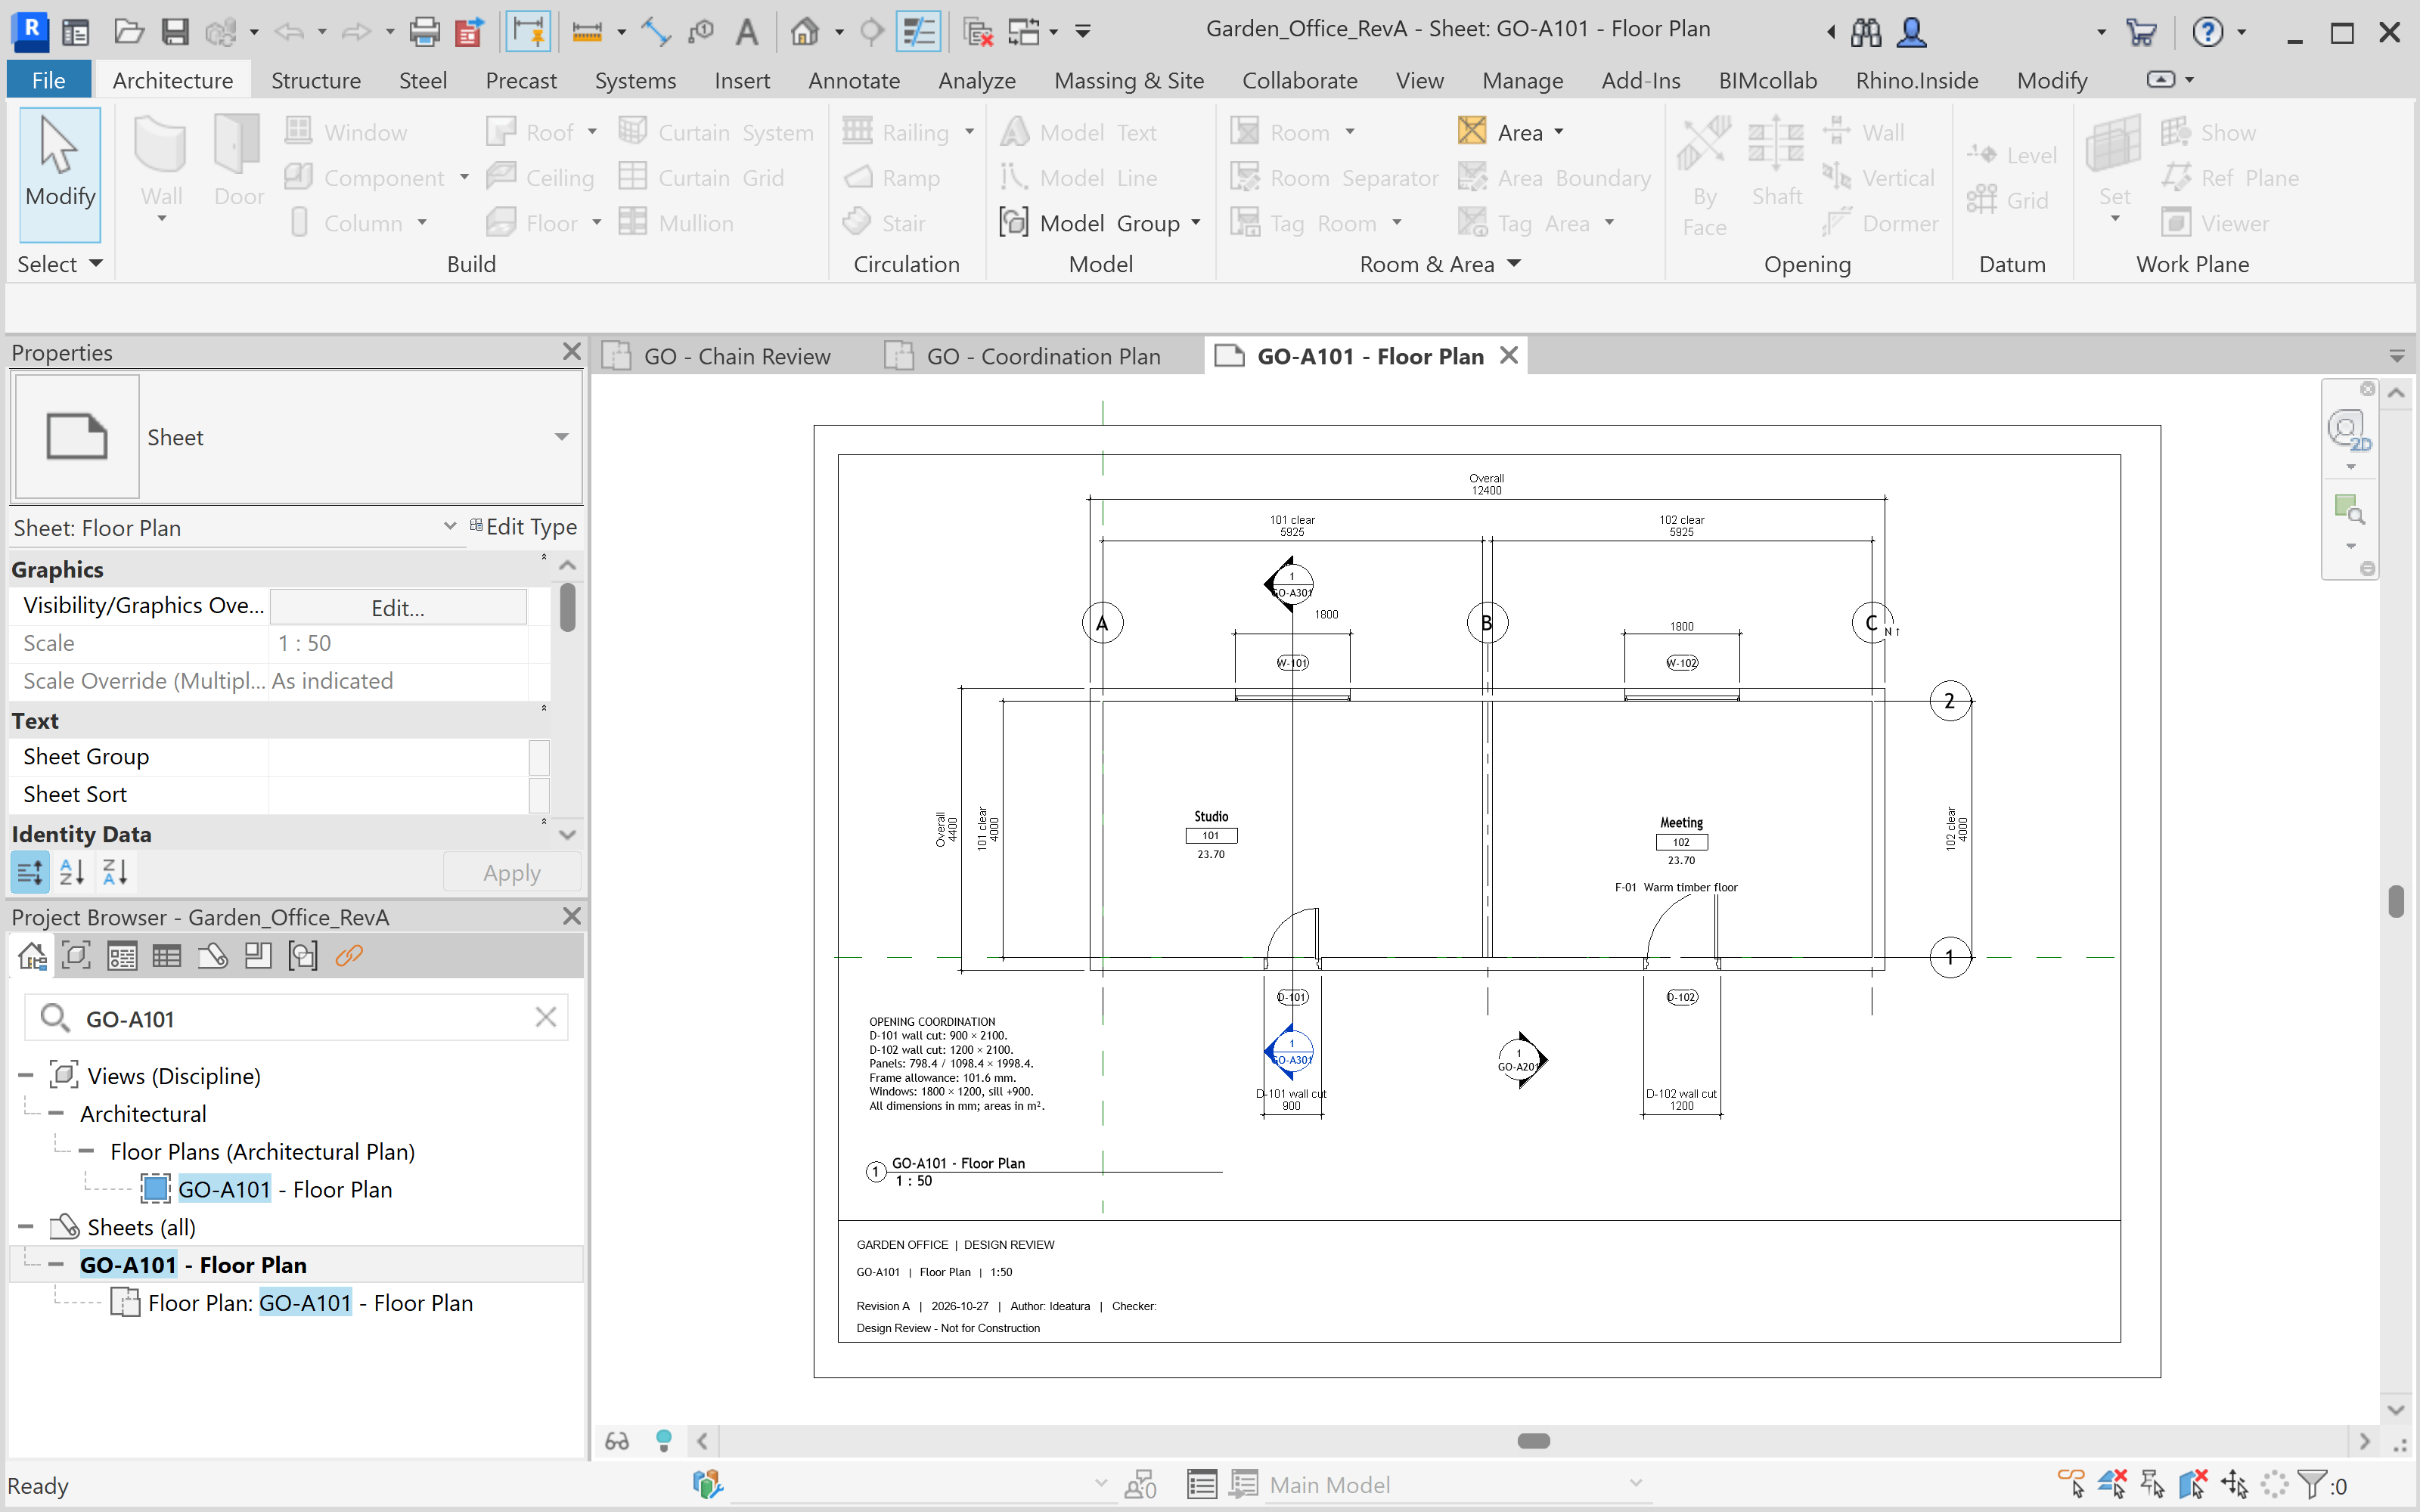
Use Wall dimensions, Place tags or Schedules for drawing tasks. For a drawing set, follow Room packages. The existing sample sheet below shows what to review: the placed view, its title and scale, and the title block. Check their fit and specify any templates or annotations still needed. Full Revit window showing Garden Office sheet GO-A101 with a dimensioned floor plan, view title, scale and title block.
4. Organise the project

Rename selected views or renumber doors by picking in the required order. Check view names, door marks and visible tags separately. Create grids or levels as separate tasks with a defined scope.

5. Work on models and families

Follow Edit existing models for a limited change, DWG to Revit for reconstruction from a vector drawing, or Revit families for a component with defined parameters. Each guide explains its inputs, demonstrated result and checks.

6. Inspect and save

Review the result in Revit before saving or synchronising. Check references, placement and missing or repeated items; for models and families, also check dimensions and editability. Use Review and recover for corrections or Reuse across projects before applying saved work elsewhere.