- Define the check
Open your own project and supply a drawing checklist or register. Identify the sheets, expected views, naming rules, permitted scales and required sheet information. Include exceptions, such as an elevation that is intentionally omitted.
Make each rule specific. For example, require one room plan, one RCP and four elevations on each selected room sheet, with scales set by your drawing standard. Explain how views should be matched to their room and sheet.
- Build the checking automation
Start a new chat with the intended Revit document connected. For example:
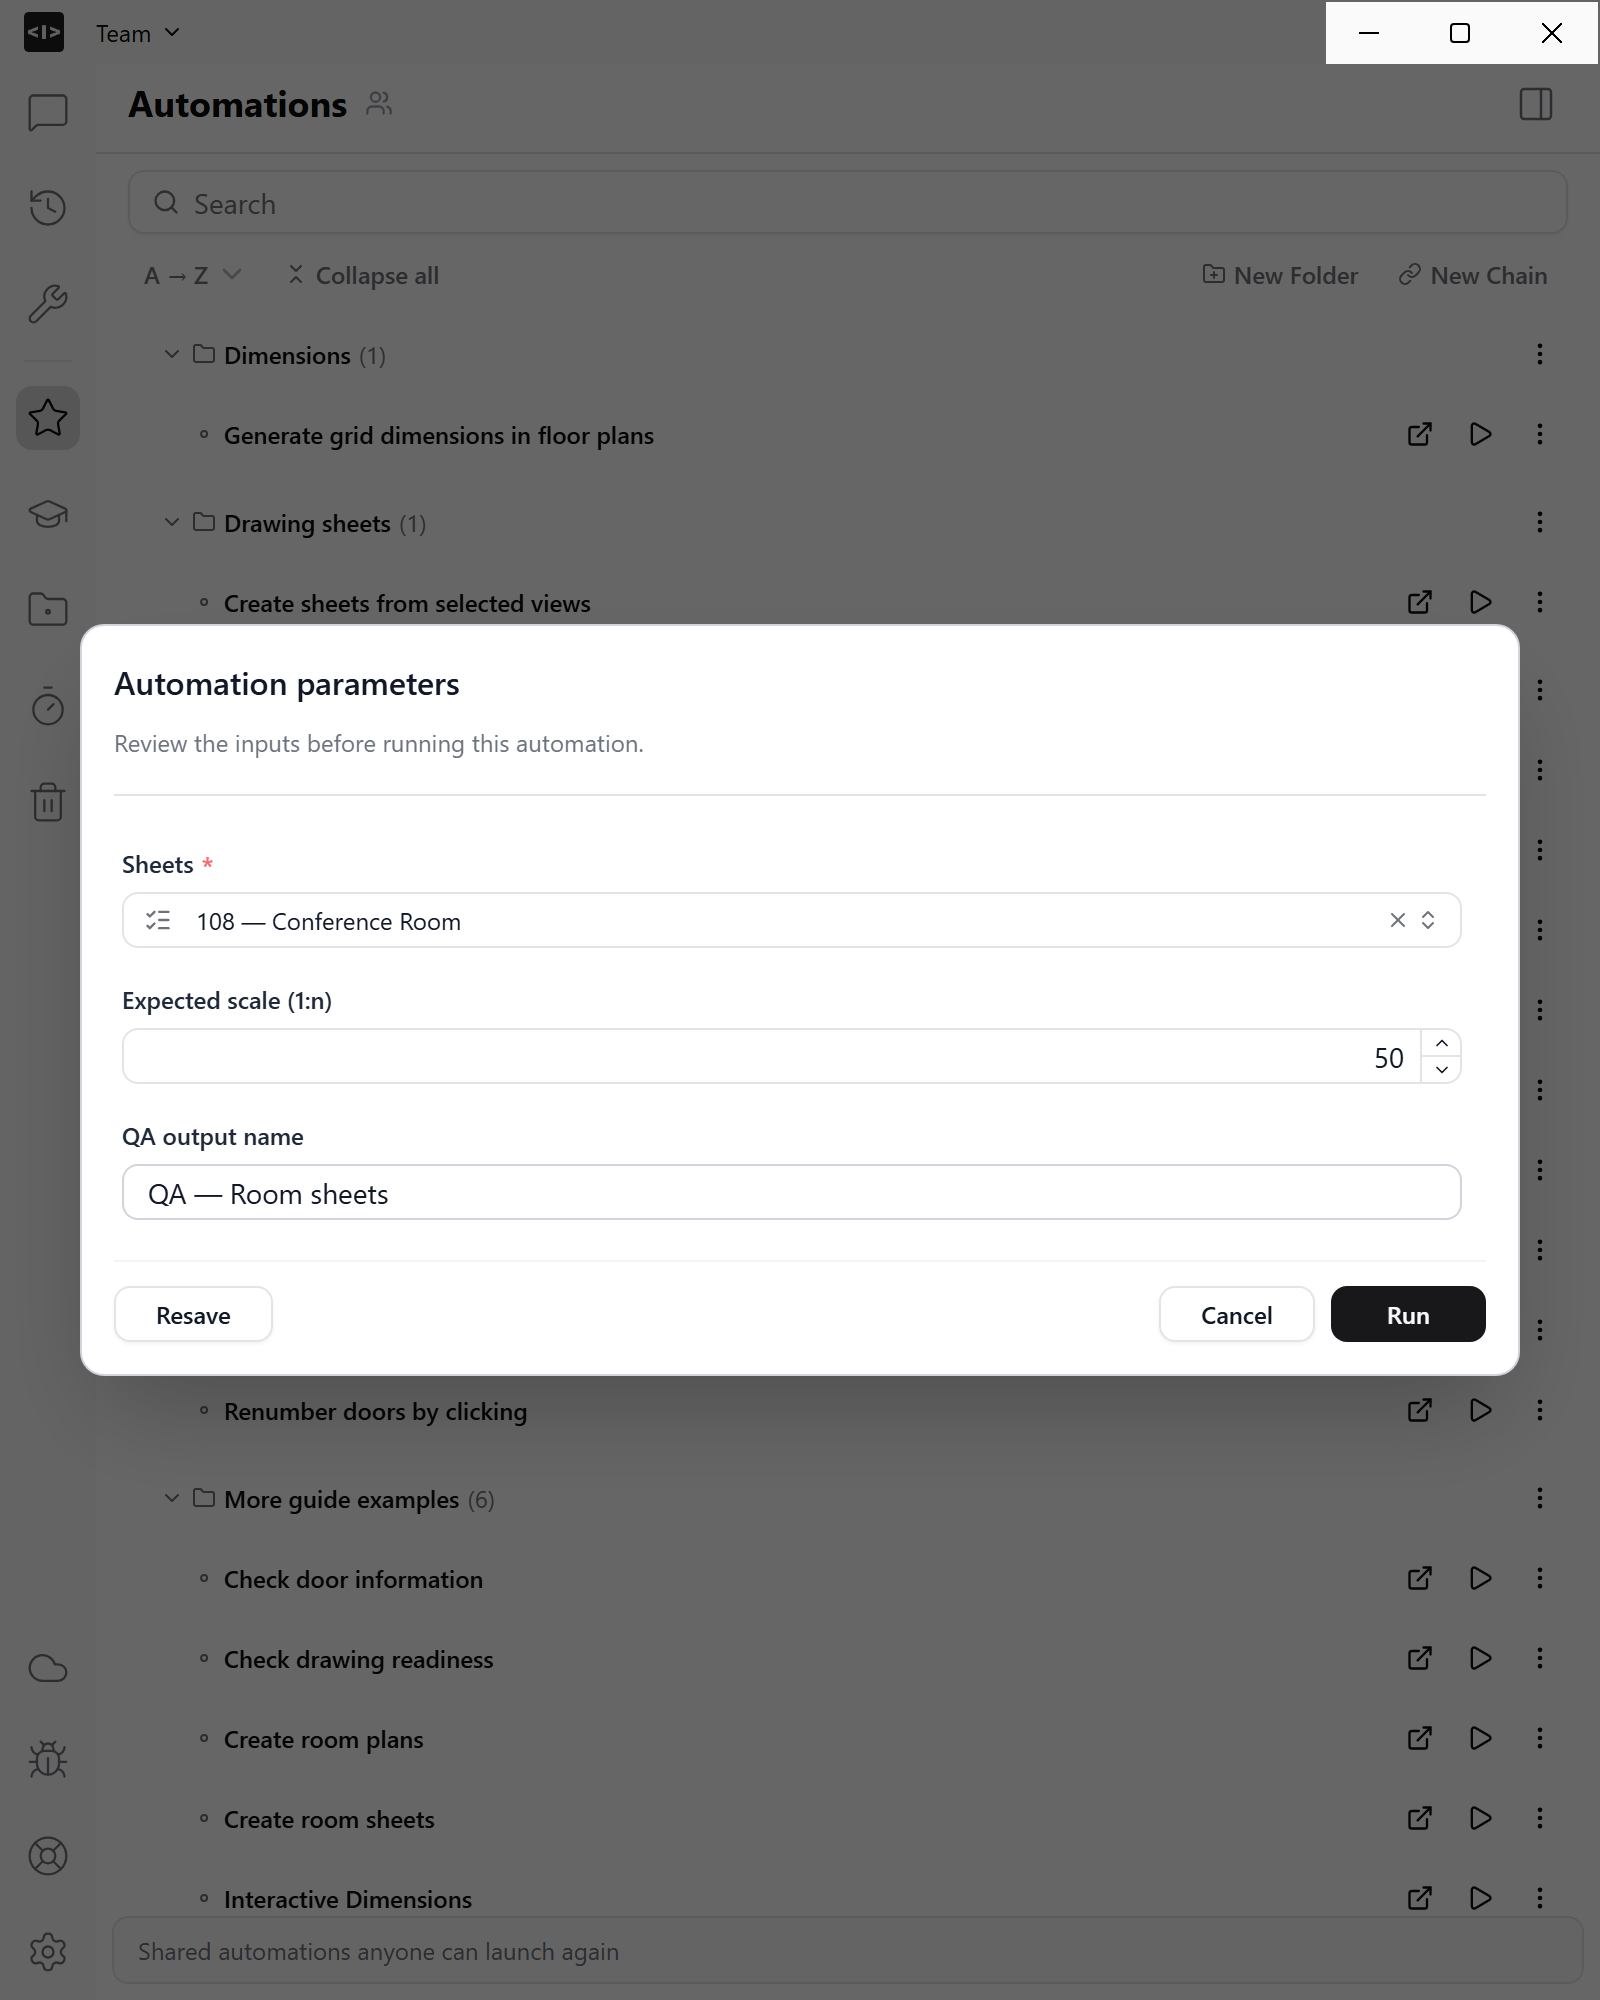
Create an automation to review the selected sheets against this drawing checklist. Check required sheet information, naming, view scales and whether the expected views are placed. Create or update a Revit QA view with the findings by sheet. Preserve the existing sheet layouts. Separate model-data checks from items that need visual inspection.Ask for a sheet selector, expected scale and a named Revit QA view. This example checks sheet number and name, the six required views, their scales and their room identity. Open Run with parameters to review the inputs.
- Test a small scope
Choose the room sheet, its expected scale and the QA-view name, then select Run. Here, entering 50 checks for 1:50. Compare the findings with your own check; a view must be placed on the intended sheet, not just present in the Project Browser.
- Review the findings
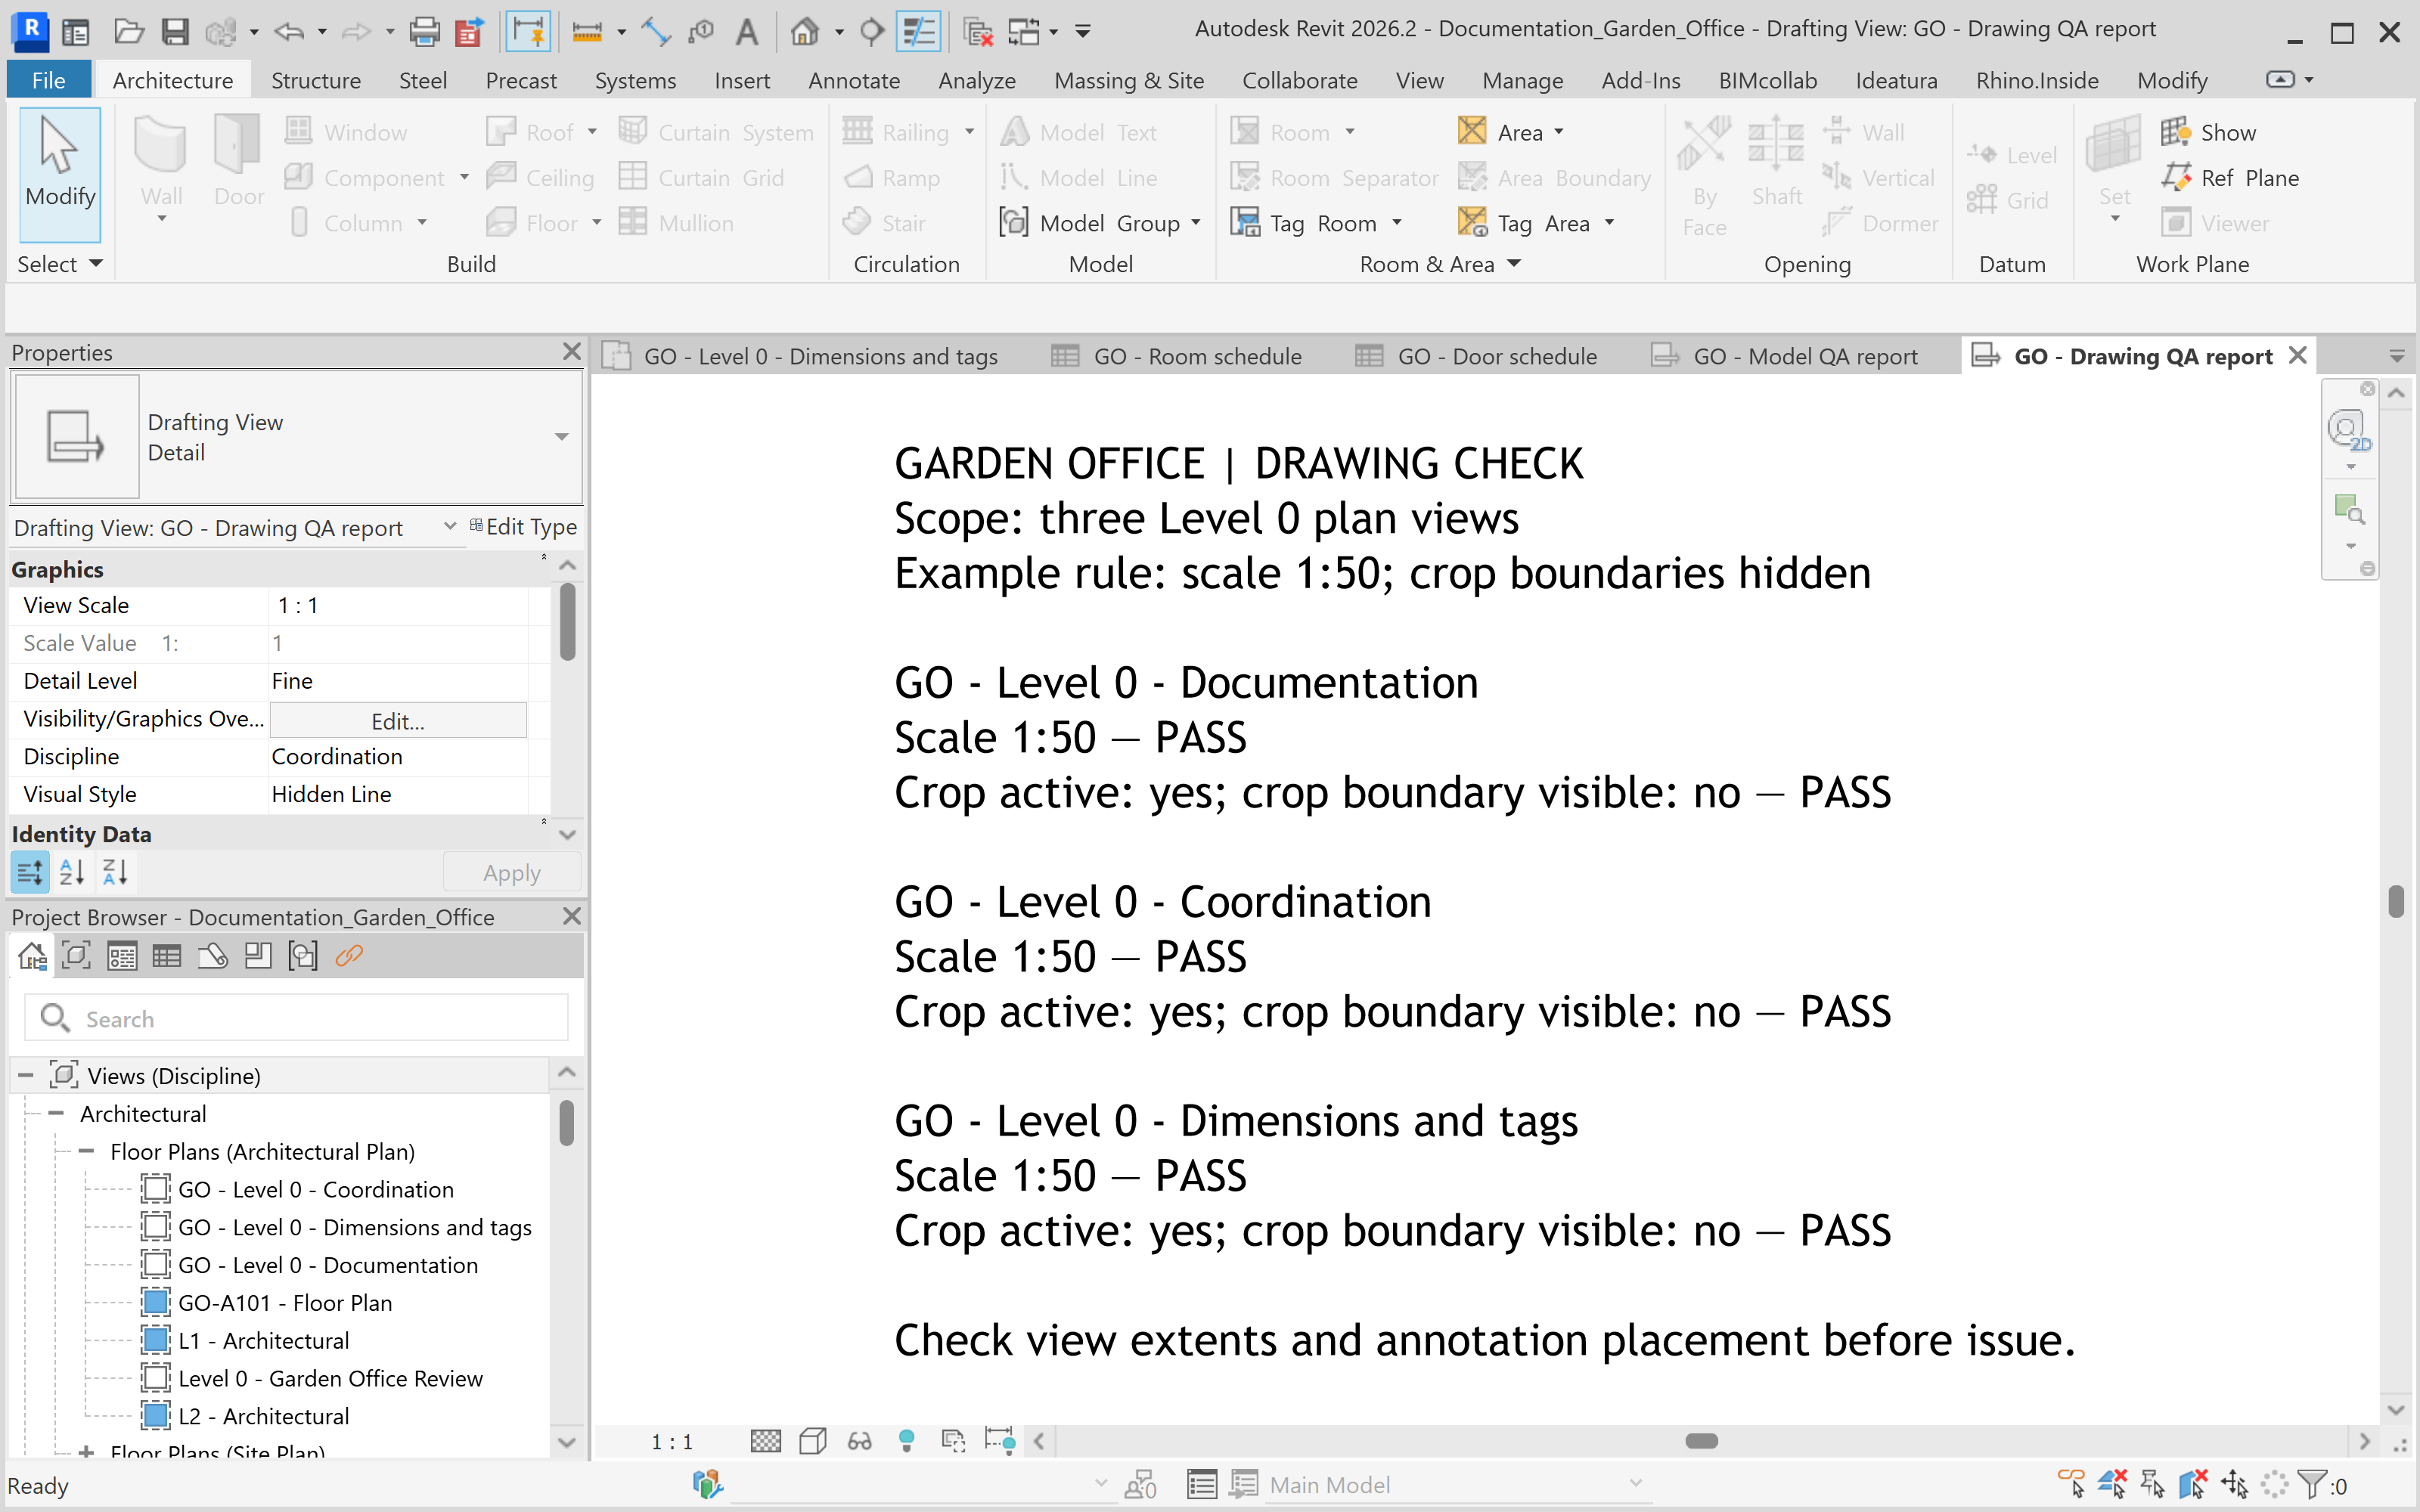
Keep the chat summary brief. The Garden Office report below checks three floor plans: all are set to 1:50, with cropping active and crop boundaries hidden. This is a small view-settings check; extend your checklist to verify sheet information and which views are placed on each sheet.